Friday, March 26, 2010

A bit of Gyprock

Another door has to go, not far, but it will be turned around.
 
With the door out of the way I could lift some more of the old vinyl tiles. Brian's compressor and mini "jack hammer" were invaluable with this.
                                
After this we had assistance from Tony to get a couple of sheets of Gyprock up in the pantry while we could still get the scaffolding in there.
 
Ellie and I would have had a lot of trouble doing this on our own but because we were all otherwise engaged with the ceiling, Tony missed out on a photo. Now it looks like I did it all by myself. Pretty good eh ?
Ellie having breakfast in the mess. Surely, not all messes are this messy ?
View from above the alcove which will hold the fridge and freezer. Looking out through the laundry to the back door.
 Unfortunately we had another surprise when removing the corner of the laundry wall. This pipe turned out not to be under the concrete in this area as expected. $280 later it was out of the way.
And that's it for another weekend.

Thursday, March 18, 2010

More beams

Serious things are happening now. This beam, which was an afterthought put in when the front wall of the pantry was constructed, is now going.
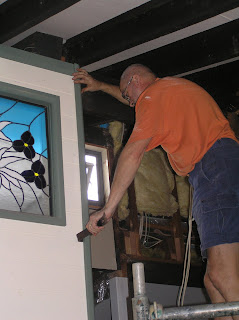
Before it could go, the pantry wall had to go, which meant removing Ellie's lead-light windows. These were taken down and packed away carefully, awaiting a new wall to support them.

It wasn't long before the windows were out and the cladding coming off. Ellie got into the swing of it as the lower boards became accessible. 
Time to put up the first beam on the pantry side so Ellie was up on the scaffold like a shot.
 
The beam is up but what is it for ? It seems to be floating. This is building in reverse. First put up your beam, then support it with something !
 
Forget the support. Let's put up another one.
 
So there is the result (with a rather naked pantry) although that beam will continue next week. We also finished the beams on the window side too.

Thursday, March 4, 2010

It continues

The spaces under the windows have been bricked up on the inside and the boxes for power points and switches have been set in to the wall. Ellie is using her new "island" bench for cooking, frothy coffee in hand to make light of the work.
 

The next step was to complete the removal of the wall at the end of the hallway. This included replacing the supporting post which holds the central beams (the ones which don't line up). I was quite nervous doing this because although everything was propped up temporarily, a lot of weight seemed to be on one stud which should not have been holding up anything. Anyway, it all turned out OK.


This isn't the offending post. That was the one which the white one on the left replaced.


With all the timber out of the way I was able to finish the bagging at the corner of the hallway. That strip doesn't look like it's been done but the difference is that we have refined our method with the bagging as we have gone along and now we can leave a fairly clean surface. The concern now is that it might show through the paint.